


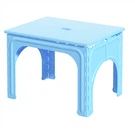
If you’ve ever spent time in the chair mould business, you know release performance makes or breaks a production run. Nothing kills efficiency faster than parts sticking to the mould cavity—hours lost prying chairs loose, scrap pieces piling up, and downtime that eats into profits. As a chair mould supplier, I’ve tweaked hundreds of designs to fix this, and today I’m breaking down the actionable, real-world moves that actually work to make releases smooth and consistent. Whether you’re running Air Assistant Chair Mould for lightweight outdoor models or Rattan Chair Mould that replicate woven texture, these tips apply across every chair mould type.
First off, let’s talk about mould surface prep—this is the foundation of good release, and it’s way more than just wiping it down. I see a lot of teams skipping this step or doing a quick once-over, but even tiny leftover resin bits or micro-scratches act like glue during injection. Last year, a client running Pc Chair Mould for office chairs was getting a 12% scrap rate from sticking; turns out their moulds had been sanded with 600-grit sandpaper instead of 1200-grit. Micro-scratches from too-coarse sand catch molten plastic and pull at it during ejection, so switching to a finer grit smoothed out the texture and eliminated those hot spots. After sanding, you need to polish the cavity surface to a mirror finish—wait, not just any polish. Use a diamond paste (1 micron or finer) for the final pass, then run a ultrasonic cleaner with isopropyl alcohol for 10 minutes to get into the nooks and crannies of hard-to-reach areas, like the underside of armrests or the curve of a baby chair leg. Speaking of baby chairs, Baby Chair Mould has tight, detailed parts, so even a speck of dirt in those tiny seams will cause sticking—don’t cut corners here.
Next, release agent selection and application—this is where a lot of people overcomplicate things, either by using too much or too little. I used to work with a client who sprayed so much silicone release agent on their Metal Leg Chair Mould that the metal legs came out slippery and hard to assemble. The key is to pick the right release agent for your resin type, then apply it evenly in thin coats. For polypropylene (PP) chairs, which are super common, a water-based, non-silicone release agent works best—silicone can contaminate future painting or bonding steps if you’re doing post-mould finishing. For PC, like that office chair mould I mentioned earlier, a light silicone-based agent is okay because PC has better bonding on its own, and sticking is more of an issue here. How you apply it matters too: spray it in a cross-hatch pattern, not just straight up and down, to make sure every part of the cavity gets covered. Let it air dry for 30 seconds before closing the mould—if you close it too fast, the agent smudges and leaves thin spots that cause sticking mid-run. Pro tip: test a small scrap of resin on the mould first before applying it to full runs—this catches bad agent matches before you waste resin and time.
Mould temperature regulation is another big one that gets overlooked. If the mould is too cold, the outer layer of resin solidifies too fast, pulling away from the cavity unevenly and creating tiny areas of friction that make parts stick. If it’s too hot, the resin doesn’t set enough when ejection happens, so it deforms and gets stuck. For most chair moulds, the optimal cavity temperature is between 40°C and 60°C, depending on the resin. For Air Assistant Chair Mould, which uses air to help shape lightweight parts, I recommend keeping the mould at 50°C—cooler than that and the air won’t spread evenly, but warmer and the thin air-formed parts warp during ejection. How do you keep the temperature consistent? Install temperature sensors at multiple points on the cavity, not just the machine’s main control panel. A lot of machine sensors only read the core temperature, so if your cavity is a few degrees cooler near the base of the chair, you’ll get sticking there. I also suggest using independent cooling lines for the cavity and core—this way you can adjust each to its own sweet spot without messing up the other. Last quarter, a client running rattan chair moulds was having issues with the woven texture sticking because their cooling lines were only in the core; adding a small line near the cavity surface fixed that in a week.
Ejection system design is where we can really fine-tune performance, and it’s not just about having enough ejector pins—it’s about where you place them. Too many pins in one spot cause uneven pressure, which makes the chair twist during ejection and stick. For a standard dining chair, I use 8-10 small ejector pins, placed at the thickest, sturdiest parts of the chair: the underside of the seat, the top of each leg, and the base of the backrest. You want to avoid placing pins on curved or thin edges, like the sides of a baby chair’s legs, because that can deform the part. Also, make sure the pins are the right size—if they’re too small, they bend under pressure and don’t push evenly; too big, and they leave ugly marks on the finished chair. For large parts like metal leg chair moulds, I sometimes add air ejection ports in addition to mechanical pins—small, invisible holes that blow a burst of air between the part and the cavity right before the pins push. That tiny air gap cuts friction so much I’ve seen runs go from 10 parts an hour to 25, with zero sticking. Wait, and don’t forget to lubricate the ejector pins every month—dry pins get stuck, and when they do, they yank on the part and cause damage. A light coat of molybdenum disulfide grease works, just make sure not to get it on the cavity surface.
Resin flow and injection pressure also play a role, it might not be the first thing you think of but it ties straight to release. If you inject resin too fast, it hits the cavity walls hard and cools unevenly, creating areas where it’s bonded tighter than normal. Too slow, and the resin cools before it fills the mould, but that’s less related to sticking. For most chair moulds, a medium injection speed works best—you want the resin to fill the cavity smoothly without slamming into the walls. For pc chair moulds, which are more rigid than PP, I bump the speed up just a little, but add a slight hold pressure for 2 seconds after injection to make sure the seat edges are fully set before ejection. Also, use a consistent resin batch every time—changing resin grades or vendors can change how it sticks to the mould, so if you do switch, test a small run first. I had a client switch to a cheaper PP resin to cut costs, and their sticking rate jumped from 3% to 9% because the new resin had more additives that bonded better to steel. Sticking with your trusted resin supplier saves you headaches, even if it’s a tiny bit more expensive per pound.


One final thing I’ve learned over the years: regular mould maintenance isn’t a “set it and forget it” job. Even the best moulds will degrade over time, with micro-wear on the cavity surface that builds up and causes sticking. I recommend doing a deep clean and full inspection every 50,000 cycles, or at least once every three months for high-volume runs. During this maintenance, you can re-polish small areas that have worn down, check ejector pins for bending or wear, and replace cooling lines if they’re clogged (clogged lines cause uneven temperature, which we already know is a release killer). For specialty moulds like baby chair moulds, which have a lot of small details, I even do a partial re-polish every 30,000 cycles to keep those tiny surfaces smooth.
At the end of the day, improving release performance isn’t about one big fix—it’s about combining small, consistent tweaks to surface prep, materials, design, and maintenance. Whether you’re scaling up air assistant chair mould production for outdoor events or running metal leg chair moulds for residential dining sets, these steps will cut down on downtime, reduce scrap, and make your production run way more efficient. If you’re struggling with sticking issues specific to your chair mould, don’t hesitate to reach out—we’ve worked with every type of chair mould out there, and we can help you adjust your setup for your exact needs. Let’s chat about your project and find the right solutions together.
References:
- Mould Design Fundamentals for Injection Moulding, Society of Plastics Engineers, 2021
- Release Agent Selection and Application Guide, Industrial Moulding Solutions, 2022
- Injection Mould Temperature Control: Best Practices for Reducing Defects, Journal of Manufacturing Processes, Vol. 45, 2020
- Ejection System Design for Plastic Parts, Plastics Technology Magazine, 2021
- Rattan Chair Mould Performance Optimization, Outdoor Furniture Moulding Association, 2022